
Build a gated service FOB in the 3D builder
Open the finished Gated service FOB in the 3D builder. It has 22 placed pieces and needs 1,740 supplies. Open Full screen, then use the build-stage buttons to see the base grow from its perimeter to the finished service lane. Save your own copy before changing the layout.
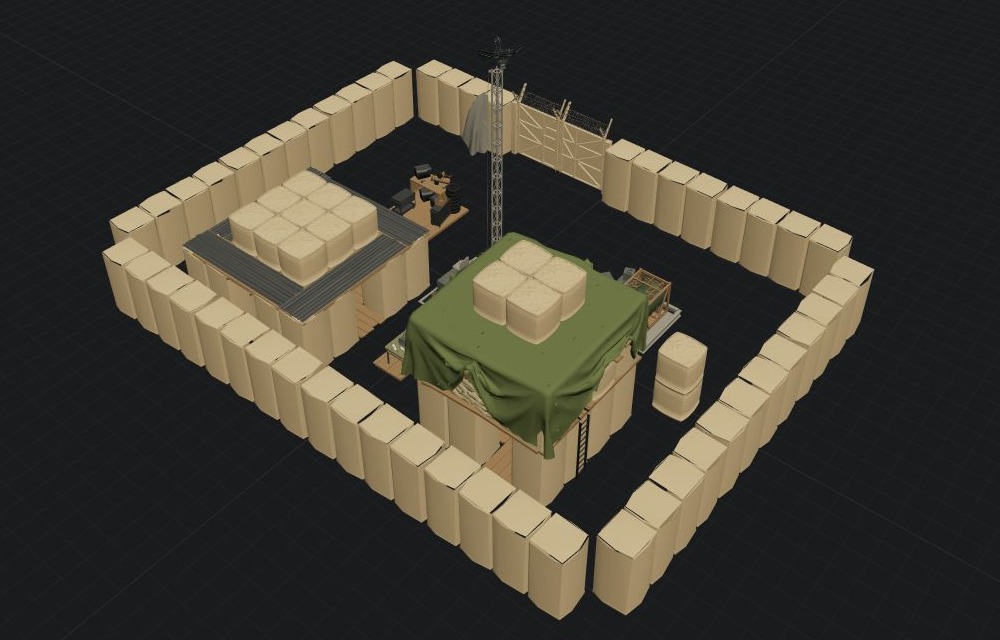
The gate breaks one wall line. The FOB, shelter, tower and service pieces sit inside the perimeter.
Check the space before adding equipment
The Forward Operating Base is at 0 / 0 / 0 m. Thirteen Hesco Walls run around it, with a Gate in one side. Narrow seams are visible between wall pieces. Check those joins in the game if you need a closed barrier.
From above, the Indirect Fire Shelter and Recon Tower occupy separate inner positions. The Repair Station and Refuel Station are nearer the gate, with Builder's Radio between the inner structures. A pair of small Hesco blocks sits beside the opposite wall. Hover a placed piece to check its name, stage, supplies and position before selecting it.
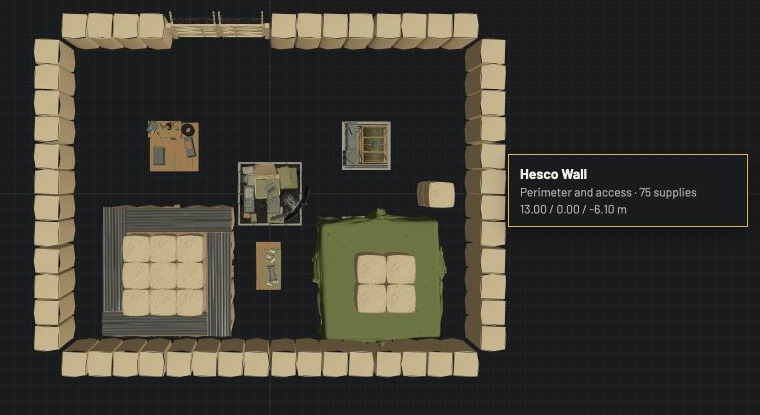
Top view shows the gate and inner spacing. Hovering a wall reveals its build stage, supply cost and saved position.
Move through the build stages
Use Prev and Next above the scene to move through this base. Perimeter and access has the FOB, gate and thirteen walls: 15 pieces, 1,090 supplies. Observation adds the shelter, tower and two Hesco blocks: 19 pieces, 1,320 supplies through that stage. Service lane adds repair, refuel and radio: 22 pieces, 1,740 supplies in the finished base.
The scene and manifest show the pieces built so far. The footer shows the supply cost through the selected stage and the cost of the full base. In Details, name or add a stage. Use Move earlier or Move later to change its order; Remove empty phase deletes a stage once it contains no pieces. Select a placed piece to change Placed in phase. The builder rejects a stage order that leaves a stacked piece without its support.
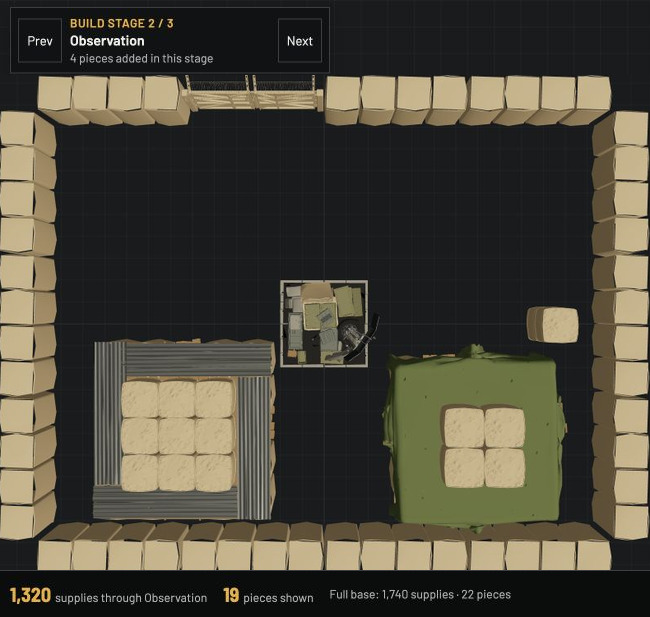
Observation adds four pieces for 230 supplies. The full base still needs 1,740 supplies.
Stack the second Hesco block
The finished example already has both blocks. Open the stacking practice layout to try the connection yourself. It has the upper block removed: 21 pieces, 1,725 supplies.
- Open Full screen and use Prev to select Observation. You should see 18 pieces costing 1,305 supplies through that stage.
- Find Hesco Block (Small) in the catalog and select it. Leave Placement set to Socket snap.
- The lower block is at 10 / 0 / 0 m. Move the preview over it until the placement bar reads Stack socket connected to Hesco Block (Small). To reproduce the screenshot, enter 10.76 for X (m), 1.27 for Height (m) and 0.36 for Z (m) in Details. Snaps to should show 10 / 1.49 / 0 m. If the bar says Side socket connected, keep adjusting before placing.
- Press Place piece, then Cancel to stop adding blocks. Observation now shows 19 pieces, 1,320 supplies. The full base is back to 22 pieces, 1,740 supplies.
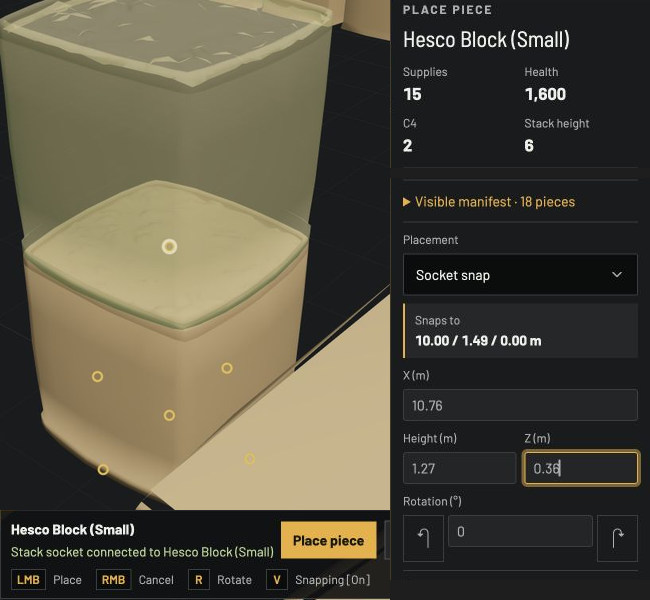
The rings and placement bar show the chosen connection; Details shows the position the builder will save.
Choose a supply load that fits your vehicle
With Service lane selected, choose Plan supply run. The builder quotes two ways to carry its 1,740 Build Supplies. 35 loose bundles carry 1,750, leave 10 spare and cost $350; loose supplies use trunk slots. One Build Supply Pallet carries 1,800, leaves 60 spare and costs $400; a pallet uses vehicle bed space. The cheaper option is useful only if your vehicle can hold those loose bundles.
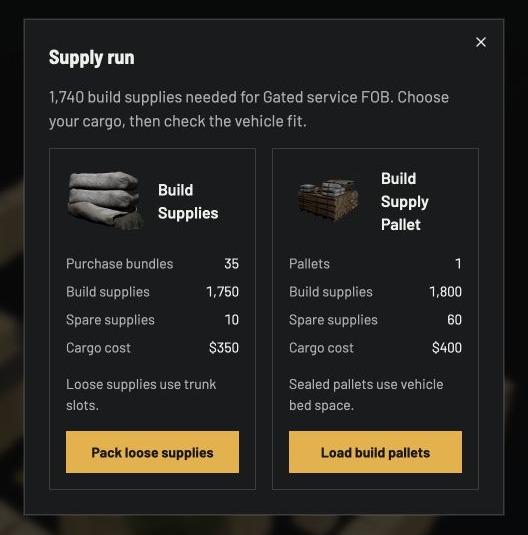
The dialog prices the two cargo forms; it does not decide vehicle fit. On an earlier stage, the same action quotes supplies through that stage.
Choose either action to carry the filled manifest into Vehicle cargo. Pick the vehicle there and check the actual fit. The cargo guide explains the grid and capacity result; the quantity planner is useful when you want to price counts before arranging a base in 3D.
Save a copy or start from a map point
Save base keeps the named layout on your device or account according to your current sign-in state. Copy link copies a shareable address. Open that address in another tab to load the same pieces, phases and positions. The finished plan link at the top of this article opens the same 22-piece layout, so you can inspect the manifest and change the gate or station positions yourself.
This example uses the construction pad. For terrain, open a location such as Tower 1 on Kavkazi and follow its 3D FOB builder link. Tower 1 itself occupies the starting point: the first FOB preview says Intersects scenery. Move it to clear ground and wait for Ready to place. A mapped plan retains its world and position when shared. The Kavkazi map helps you choose another starting location. Check the chosen ground in the game before relying on the mapped plan.